Common DIY Dollhouse Mistakes to Avoid
#Dollhouse Miniature GuideAvoid the most common DIY dollhouse mistakes with this practical beginner's guide. Learn how to prepare your workspace, organise miniature parts, use glue correctly, install lighting safely, and build your dollhouse with confidence. These expert tips will help you avoid frustration and create a beautiful finished miniature you'll be proud to display.
Building a DIY dollhouse is a rewarding and relaxing hobby, but even experienced builders can make mistakes along the way. Rushing through the instructions, using too much glue, or skipping preparation can lead to unnecessary frustration and make the building process more difficult than it needs to be.
The good news is that most DIY dollhouse mistakes are easy to avoid. In this guide, you'll discover the most common pitfalls, learn how to prevent them, and pick up practical tips that will help you enjoy a smoother and more successful miniature building experience.
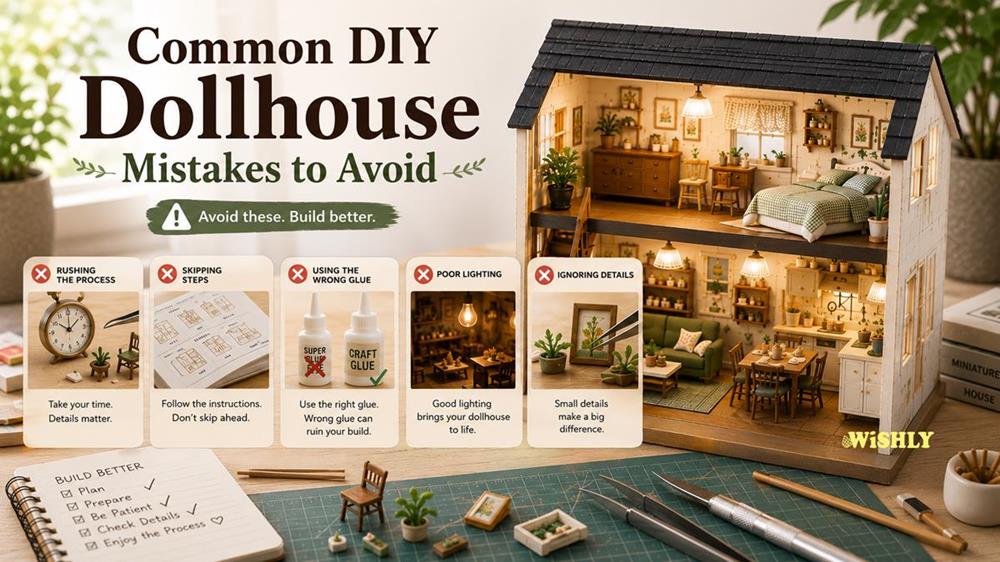
Table of Contents
1. Prepare Before You Start
2. Don't Rush the Building Process
3. Common Assembly Mistakes to Avoid
4. Mistakes to Avoid After Finishing Your DIY Dollhouse
5. Every DIY Dollhouse Helps You Become a Better Builder
6. Build with Confidence and Enjoy Every Miniature Project
7. Frequently Asked Questions
1. Prepare Before You Start
A little preparation can make a big difference when building a DIY dollhouse. Taking a few minutes to organise your workspace, gather the right tools, and understand the instructions will help you avoid common mistakes and make the entire building process more enjoyable. Before opening your DIY dollhouse kit, take the time to set yourself up for success.Read the Instructions First
It can be tempting to jump straight into building, but reading through the instruction manual before you begin will help you understand the overall process. Familiarising yourself with the steps makes it easier to identify parts, avoid confusion, and spot any special assembly requirements.Organise the Parts
Most DIY dollhouse kits include hundreds of miniature components. Before you start assembling, sort similar pieces into small containers or trays to keep everything organised. This simple step saves time and reduces the chance of losing tiny parts.Prepare Your Tools
Having the right tools within reach makes building much smoother. Essential tools often include tweezers, craft glue, small scissors, a craft knife, and a ruler. Keeping everything organised means you won't have to interrupt your progress to search for what you need.Choose a Comfortable Workspace
Build your dollhouse on a clean, flat, and well-lit surface where you can leave your project undisturbed between sessions. Good lighting makes it easier to work with small details, while a tidy workspace helps prevent misplaced parts and accidental damage.Take Your Time
One of the most common beginner mistakes is feeling rushed to finish the project. Remember that a DIY dollhouse is designed to be enjoyed over multiple sessions. Building slowly and carefully often produces better results and makes the hobby much more relaxing.Good Preparation Leads to Better Results
Spending a little extra time preparing before you start can help you avoid many of the common problems beginners face. With an organised workspace, the right tools, and a clear understanding of the instructions, you'll be ready to enjoy a smooth and rewarding DIY dollhouse building experience.Continue Exploring
Building your first miniature? Read our DIY Dollhouse Guide for Beginners for a complete walkthrough of everything you need to know before starting your first project. Read: DIY Dollhouse Guide for Beginners2. Don't Rush the Building Process
One of the biggest mistakes beginners make is trying to finish their DIY dollhouse as quickly as possible. While it's exciting to see your miniature house come together, rushing often leads to misplaced pieces, messy glue, and unnecessary frustration. Building a DIY dollhouse is meant to be a relaxing hobby. Taking your time allows you to enjoy each stage of the project while achieving a cleaner and more professional-looking result.Follow the Instructions Step by Step
Every DIY dollhouse kit is designed to be assembled in a specific order. Skipping ahead or assembling sections out of sequence can make later steps more difficult and may require you to undo completed work. Completing each step carefully helps ensure every piece fits correctly.Allow Glue to Dry Properly
It's tempting to continue building immediately after applying glue, but moving pieces before the adhesive has fully set can cause them to shift out of position. Allowing enough drying time creates stronger joints and reduces the chance of needing repairs later.Check Each Step Before Moving On
Before progressing to the next stage, take a moment to make sure every component is positioned correctly and securely attached. Fixing a small mistake straight away is much easier than discovering it several steps later.Build in Short Sessions
Rather than trying to complete your dollhouse in one sitting, consider building over several shorter sessions. Working for an hour or two at a time helps you stay focused, reduces fatigue, and makes it easier to enjoy the creative process.Don't Compare Your Progress
Every builder works at a different pace. Some people complete a miniature house in a few weekends, while others enjoy building over several weeks. Focus on your own progress and enjoy watching your miniature world gradually come to life.Slow and Steady Produces the Best Results
Patience is one of the most valuable tools when building a DIY dollhouse. Taking your time, following the instructions carefully, and enjoying each stage of the process will help you create a finished miniature you'll be proud to display.Continue Exploring
Wondering how long a DIY dollhouse typically takes to build? Read our How Long Does It Take to Build a DIY Dollhouse? guide to learn what affects build time and what you can expect from different types of miniature kits. Read: How Long Does It Take to Build a DIY Dollhouse?3. Common Assembly Mistakes to Avoid
Even when you work carefully, it's easy to make small mistakes during the building process. Fortunately, most of them are simple to avoid with a little patience and attention to detail. Here are some of the most common DIY dollhouse assembly mistakes—and how to prevent them.Using Too Much Glue
One of the most common mistakes is applying more glue than necessary. Excess glue can seep out around miniature furniture, stain decorative surfaces, and create a messy finish that's difficult to remove. Apply a small amount of glue at a time and add more only if needed. A neat application will give your finished dollhouse a much cleaner appearance.Attaching Pieces in the Wrong Position
Many miniature components look similar, making it easy to attach the wrong piece or place it incorrectly. Before applying glue, dry-fit the parts to make sure they align properly and match the instructions. Taking a few extra seconds to check the fit can save a lot of time later.Handling Delicate Parts Too Roughly
Miniature furniture, paper decorations, and tiny accessories are often more fragile than they appear. Applying too much pressure when assembling or moving pieces can bend, tear, or break delicate components. Handle every part gently and use tweezers whenever possible for smaller pieces.Rushing the LED Lighting Installation
If your DIY dollhouse includes LED lighting, don't rush this stage. Carefully follow the wiring instructions and test the lights before permanently securing components in place. Identifying any issues early is much easier than taking the dollhouse apart after assembly.Ignoring Small Mistakes
A slightly crooked shelf or loose chair might not seem important at first, but small mistakes can become more noticeable once the dollhouse is finished. If something doesn't look right, it's usually worth correcting it before moving on to the next step.Careful Building Creates Better Results
DIY dollhouses are built one small piece at a time. Paying attention to each detail, using the right amount of glue, and checking your work as you go will help you create a miniature house that's both sturdy and beautifully finished.4. Mistakes to Avoid After Finishing Your DIY Dollhouse
Completing your DIY dollhouse is a rewarding achievement, but how you care for it afterwards is just as important as how you built it. A few simple habits can help preserve your miniature for years, while common display and maintenance mistakes can gradually affect its appearance. Here are some of the most common mistakes to avoid once your dollhouse is complete.Displaying It in Direct Sunlight
A bright windowsill might seem like the perfect place to display your miniature, but prolonged exposure to direct sunlight can cause colours to fade and certain materials to deteriorate over time. Choose a location with plenty of natural light while avoiding direct sunlight whenever possible.Forgetting to Dust Regularly
Dust may seem harmless, but over time it can settle into tiny furniture, plants, and decorative details, making your dollhouse more difficult to clean. A light dusting every few weeks with a soft makeup brush or hand air blower will help keep your miniature looking fresh without damaging delicate parts.Displaying It in Humid Areas
High humidity can affect wooden components, paper decorations, fabrics, and adhesives. Avoid displaying your DIY dollhouse in damp environments such as bathrooms, laundries, or areas with poor ventilation. A cool, dry room is the ideal environment for long-term preservation.Moving the Dollhouse Incorrectly
Finished dollhouses can be heavier and more delicate than they appear. Lifting the model by the roof, balconies, or decorative sections can damage the structure or loosen miniature accessories. Whenever you move your dollhouse, support it from the base with both hands and transport it carefully.Leaving It Unprotected
If your dollhouse is displayed in an open area, it will naturally collect more dust and may be more likely to be bumped accidentally. Display cabinets or acrylic cases offer extra protection, but even a stable shelf away from busy walkways can help keep your miniature safe.Protect Your Hard Work
Building a DIY dollhouse takes patience, creativity, and attention to detail. Taking a few simple steps to care for your finished miniature will help preserve everything you've worked so hard to create, allowing you to enjoy your dollhouse for many years to come.Continue Exploring
Want to keep your miniature looking its best? Read our How to Clean and Care for a DIY Dollhouse guide for practical cleaning and maintenance tips that will help preserve your finished build. Read: How to Clean and Care for a DIY Dollhouse5. Every DIY Dollhouse Helps You Become a Better Builder
Every DIY dollhouse is an opportunity to learn something new. Whether it's your first miniature house or your tenth, each project helps you build confidence, improve your techniques, and discover new ways to bring tiny spaces to life. Don't worry if everything isn't perfect the first time. Even experienced miniature enthusiasts occasionally make small mistakes. What matters most is enjoying the creative process and learning from each build.Practice Builds Confidence
The more DIY dollhouses you complete, the more familiar you'll become with miniature assembly techniques, handling delicate components, and working with tiny decorative details. Skills that may seem challenging on your first project often become second nature with experience.Every Project Teaches Something New
Each dollhouse offers a unique building experience. One project might help you improve your furniture assembly, while another introduces LED lighting, landscaping, or intricate interior decorating. Every completed miniature expands your skills and prepares you for your next build.Focus on Progress, Not Perfection
A DIY dollhouse doesn't need to be flawless to be something you're proud of. Small imperfections often become part of the story behind your miniature, reminding you of the creativity, patience, and care that went into building it.Enjoy the Journey
The real joy of building a DIY dollhouse comes from watching hundreds of tiny pieces gradually transform into a beautiful miniature world. Slow down, enjoy each stage of the process, and celebrate every completed project—because each one is an achievement.6. Build with Confidence and Enjoy Every Miniature Project
Every DIY dollhouse builder makes mistakes from time to time, and that's all part of the creative journey. By preparing your workspace, following the instructions carefully, and taking your time during assembly, you can avoid many of the most common problems and enjoy a smoother, more rewarding building experience. Whether you're looking for your very first miniature house or your next exciting project, explore our collection of DIY dollhouse kits featuring Japanese-style homes, European cottages, contemporary designs, cosy cafes, magical fantasy scenes, and beautifully crafted book nooks. There's a miniature project for every skill level and every imagination. Explore Our DIY Dollhouses7. Frequently Asked Questions
What is the most common DIY dollhouse mistake?
One of the most common mistakes is rushing the build. Taking your time, following the instructions carefully, and allowing glue to dry properly will help you achieve a cleaner and more enjoyable building experience.
How can I avoid making mistakes during assembly?
Read the instructions before you begin, organise your parts, use the right tools, and work through the build one step at a time. Patience and preparation can prevent many common problems.
Is it okay if I make a mistake while building?
Absolutely. Small mistakes are a normal part of learning any new hobby. Many can be corrected during assembly, and every completed DIY dollhouse helps you build confidence and improve your skills.
How much glue should I use?
A small amount of glue is usually enough. Applying too much can create a messy finish and make delicate pieces more difficult to position accurately.
Should I build my dollhouse in one sitting?
No. Most hobbyists build over several sessions, allowing glue to dry properly and reducing fatigue. Building at a comfortable pace often produces the best results.
What's the best way to organise miniature parts?
Sorting similar pieces into small containers or trays before you begin makes them easier to find and helps prevent tiny components from being misplaced during assembly.
Can I fix mistakes after the dollhouse is finished?
Minor issues such as loose decorations or shifted accessories can often be repaired with suitable craft glue and careful repositioning. Larger mistakes may require partial disassembly, so it's always best to check each step as you build.
How can I protect my finished DIY dollhouse?
Display your dollhouse away from direct sunlight and high humidity, dust it regularly with a soft brush, and move it carefully by supporting the base with both hands.
Are DIY dollhouse kits suitable for beginners?
Yes. Many DIY dollhouse kits are specifically designed for beginners and include clear, step-by-step instructions. Choosing a beginner-friendly kit and building at your own pace will help you enjoy a successful first project.
Where can I learn more about building DIY dollhouses?
Our collection of DIY dollhouse guides covers everything from choosing your first kit and understanding dollhouse scales to cleaning, displaying, and caring for your finished miniature.