How to Clean and Care for a DIY Dollhouse
#Dollhouse Miniature GuideKeep your DIY dollhouse looking as beautiful as the day you finished building it. This comprehensive guide covers safe cleaning methods, the best tools for removing dust, how to protect miniature furniture and delicate decorations, and practical maintenance tips to preserve your dollhouse for years. Whether you own a modern miniature home, a Japanese-style dollhouse, a cosy cafe, or a fantasy scene, these expert care techniques will help your miniature collection stay in excellent condition.
A DIY dollhouse is more than just a craft project—it's a miniature masterpiece worth preserving. With regular care and gentle cleaning, you can keep your dollhouse looking beautiful and protect its delicate details for years to come.
In this guide, you'll learn how to safely remove dust, choose the right cleaning tools, protect your miniature house from damage, and keep your DIY dollhouse in excellent condition with simple maintenance tips.
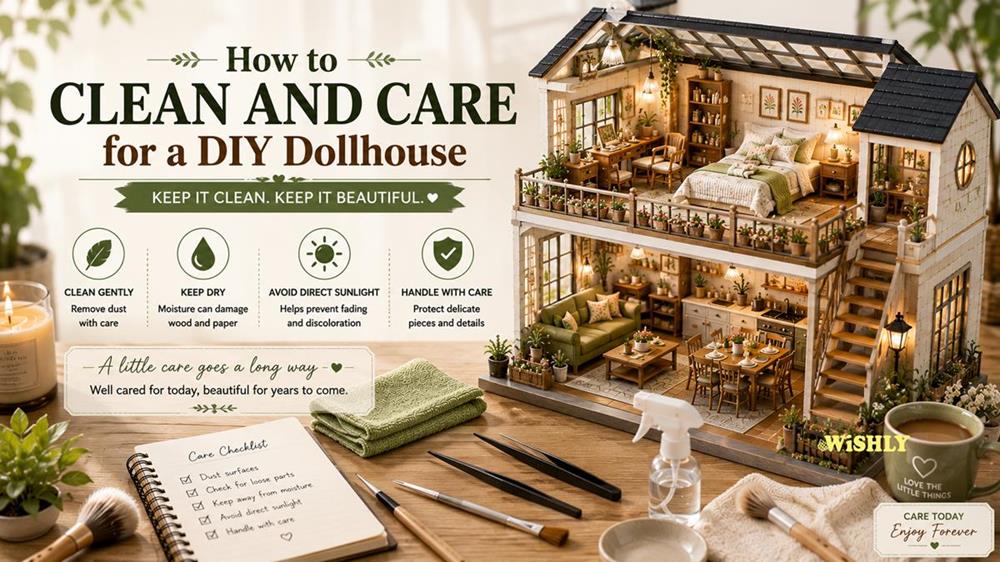
Table of Cotents
1. Essential Cleaning Tools You'll Need
2. How to Clean Your DIY Dollhouse Step by Step
3. How to Protect Your DIY Dollhouse from Damage
4. How Often Should You Clean Your DIY Dollhouse?
5. Common Dollhouse Care Mistakes to Avoid
6. Keep Your DIY Dollhouse Looking Beautiful for Years
7. Frequently Asked Questions
1. Essential Cleaning Tools You'll Need
Keeping your DIY dollhouse clean doesn't require expensive equipment. In fact, a few simple tools are all you need to remove dust, protect delicate details, and keep your miniature house looking its best. The key is to use gentle cleaning methods. Because DIY dollhouses contain tiny furniture, paper decorations, fabric, and other delicate materials, harsh cleaning products or rough tools can easily cause damage.Soft Makeup Brush
A soft makeup brush is one of the best tools for cleaning a DIY dollhouse. The fine bristles gently remove dust from miniature furniture, shelves, plants, and other delicate decorations without scratching or moving them.Air Blower
A hand air blower, like those used for camera lenses, is ideal for removing dust from hard-to-reach areas. It helps clear loose dust from corners, behind furniture, and between tiny accessories without touching fragile pieces.Microfibre Cloth
Use a clean microfibre cloth to gently wipe the exterior of your dollhouse or larger wooden surfaces. Always avoid applying too much pressure, especially around small decorations and glued components.Precision Tweezers
Tweezers aren't just useful during assembly—they're also helpful for repositioning tiny accessories that may have shifted while cleaning. They allow you to make adjustments without using your fingers.Cotton Buds
Cotton buds are perfect for cleaning small corners, window frames, and other narrow spaces. Use them dry, or only very lightly dampened if needed, taking care not to touch paper or fabric decorations.Avoid Harsh Cleaning Products
Never use household sprays, abrasive cleaners, or excessive water on your DIY dollhouse. Moisture can damage wood, loosen glue, warp paper, and stain fabrics. In most cases, gentle dusting is all that's needed to keep your miniature looking clean and well maintained.2. How to Clean Your DIY Dollhouse Step by Step
Cleaning a DIY dollhouse doesn't need to be complicated. By working slowly and using gentle techniques, you can remove dust and keep your miniature looking its best without damaging delicate decorations or furniture.Step 1: Remove Loose Dust
Start by using a soft makeup brush or hand air blower to remove loose dust from the roof, walls, furniture, and decorative accessories. Work from the top of the dollhouse down so dust falls away from areas you've already cleaned.Step 2: Clean Small Details Carefully
Use a cotton bud or soft brush to clean around windows, shelves, plants, lamps, and other detailed decorations. Take your time around delicate pieces, especially those made from paper, fabric, or thin wood.Step 3: Wipe Exterior Surfaces
If the outside of your dollhouse has collected dust or fingerprints, gently wipe larger wooden surfaces with a clean, dry microfibre cloth. Avoid using water or cleaning sprays, as moisture can damage the materials or weaken glued joints.Step 4: Check for Loose Accessories
While cleaning, inspect your miniature furniture and decorations to make sure everything is still securely in place. If a small item has shifted, use precision tweezers to carefully reposition it without disturbing the surrounding scene.Step 5: Return Your Dollhouse to Display
Once you've finished cleaning, place your dollhouse back in its display area and make sure it's protected from direct sunlight, excessive humidity, and accidental bumps. Regular light cleaning is much safer than allowing dust to build up over long periods.Clean Little and Often
A quick dust every few weeks is usually all it takes to keep a DIY dollhouse looking beautiful. Regular maintenance prevents heavy dust build-up and helps preserve the tiny details that make each miniature house so special.Continue Exploring
Looking for inspiration after finishing your build? Read our How to Display Your Finished Dollhouse guide for creative ways to showcase your miniature. Read: How to Display Your Finished Dollhouse3. How to Protect Your DIY Dollhouse from Damage
Regular cleaning is only part of keeping your DIY dollhouse in excellent condition. Where and how you display your miniature house can have an even greater impact on its long-term appearance. A few simple precautions will help protect your dollhouse from everyday wear and keep it looking beautiful for years.Keep It Out of Direct Sunlight
Direct sunlight can gradually fade colours, weaken adhesives, and cause some materials to warp over time. Display your dollhouse in a bright room with indirect natural light, or use soft indoor lighting to highlight your miniature without exposing it to harsh UV rays.Avoid High Humidity
Excess moisture can damage wooden parts, loosen glue, and affect paper decorations or fabric accessories. Keep your DIY dollhouse in a dry, well-ventilated room and avoid placing it near bathrooms, kitchens, or other areas with high humidity.Choose a Stable Display Surface
Place your dollhouse on a sturdy shelf, cabinet, or table where it won't be easily knocked over. A stable display area reduces the risk of accidental bumps and helps protect delicate furniture and decorations inside the miniature.Handle It with Care
When moving your dollhouse, always support it from the base using both hands. Avoid lifting it by the roof or decorative sections, as these areas are not designed to support the weight of the model.Keep Dust to a Minimum
Displaying your dollhouse inside a glass cabinet or acrylic display case can significantly reduce dust build-up. If that's not possible, regular light dusting will help keep your miniature clean while preventing dust from settling into hard-to-reach areas.A Little Care Goes a Long Way
With the right display location and a few simple maintenance habits, your DIY dollhouse can remain a beautiful centrepiece for many years. Preventing damage is often much easier than repairing delicate miniature details after they've been affected.4. How Often Should You Clean Your DIY Dollhouse?
The best way to keep a DIY dollhouse looking its best is through regular, gentle maintenance. Instead of waiting until dust becomes noticeable, a simple cleaning routine will help preserve delicate details and reduce the need for deeper cleaning later. The ideal cleaning schedule depends on where your miniature house is displayed and how much dust it collects.Weekly Dust Check
Take a quick look at your dollhouse once a week to see if any dust has started to settle. If you notice a light layer, use a soft brush or hand air blower to remove it before it builds up.Monthly Light Cleaning
For most DIY dollhouses, a gentle clean once a month is enough. Dust the furniture, decorations, and larger surfaces using the tools recommended earlier in this guide, taking care around delicate accessories. Every few months, spend a little extra time inspecting your dollhouse. Check that furniture and decorations are still secure, LED lights are working correctly, and there are no signs of loose glue, fading, or moisture damage.Clean More Often in Dusty Areas
If your dollhouse is displayed in an open room, near a window, or in a busy living area, it may collect dust more quickly. In these situations, shorter and more frequent cleaning sessions will help keep your miniature looking fresh without allowing dust to accumulate.Build a Simple Care Routine
Regular maintenance only takes a few minutes but can make a significant difference over time. By combining gentle dusting, careful handling, and a suitable display location, your DIY dollhouse will continue to look beautiful for years after it's completed.5. Common Dollhouse Care Mistakes to Avoid
Even with the best intentions, a few common mistakes can accidentally damage a DIY dollhouse. Fortunately, most are easy to avoid with gentle handling and regular maintenance. By knowing what not to do, you can protect your miniature house and keep it looking its best for years to come.Using Water or Household Cleaners
It can be tempting to use everyday cleaning products, but they're not suitable for DIY dollhouses. Water, sprays, and chemical cleaners can damage wood, stain paper decorations, weaken glue, and affect fabric accessories. In most cases, gentle dusting with dry tools is all that's needed.Applying Too Much Pressure
Miniature furniture and decorations are often delicate and securely glued in place. Pressing too firmly while cleaning can loosen or break tiny components. Always use a light touch and let soft brushes do the work.Displaying in Direct Sunlight
A sunny windowsill may seem like the perfect display spot, but prolonged exposure to direct sunlight can cause colours to fade and materials to deteriorate over time. Choose a bright location with indirect light whenever possible.Forgetting Regular Maintenance
Waiting until your dollhouse is heavily covered in dust makes cleaning more difficult. A quick dust every few weeks is much easier and helps prevent dirt from settling into small details and hard-to-reach areas.Moving the Dollhouse Incorrectly
When relocating your dollhouse, always support it from the base with both hands. Avoid lifting it by the roof, balconies, or decorative sections, as these areas aren't designed to carry the weight of the finished model.Small Habits Make a Big Difference
Looking after a DIY dollhouse doesn't require a lot of effort. Gentle cleaning, careful handling, and a suitable display location are usually all that's needed to preserve your miniature and enjoy it for many years.Continue Exploring
Want to avoid even more beginner mistakes? Read our Common DIY Dollhouse Mistakes to Avoid guide for practical tips that will help protect your miniature during both the building and maintenance stages. Read: Common DIY Dollhouse Mistakes to Avoid6. Keep Your DIY Dollhouse Looking Beautiful for Years
A well-maintained DIY dollhouse can be enjoyed long after the final piece has been assembled. With regular dusting, careful handling, and the right display environment, you can protect every miniature detail and preserve your finished creation for years to come. Whether you're building your very first miniature house or adding another piece to your collection, explore our range of beautifully crafted DIY dollhouse kits. With a variety of styles, scales, and themes to choose from, you'll find the perfect project to build, display, and enjoy. Explore Our DIY Dollhouses7. Frequently Asked Questions
How often should I clean my DIY dollhouse?
For most DIY dollhouses, a light dusting every few weeks and a more thorough clean once a month is enough to keep your miniature looking its best. If your dollhouse is displayed in a dusty area, you may need to clean it more frequently.
What's the best way to remove dust from a dollhouse?
A soft makeup brush or a hand air blower is ideal for removing dust from miniature furniture, decorations, and hard-to-reach areas. These tools clean gently without damaging delicate pieces.
Can I use water or cleaning sprays on my dollhouse?
It's best to avoid water and household cleaning products. Moisture and chemicals can damage wood, paper decorations, fabric accessories, and glued joints. Dry cleaning methods are the safest option for most DIY dollhouses.
Will sunlight damage my DIY dollhouse?
Yes. Prolonged exposure to direct sunlight can cause colours to fade and may weaken certain materials over time. Display your dollhouse in a bright area with indirect light whenever possible.
Should I keep my dollhouse in a display case?
A glass cabinet or acrylic display case is a great way to reduce dust and protect your dollhouse from accidental damage. While not essential, it can help keep your miniature looking cleaner for longer.
What should I do if a miniature piece comes loose?
If a small decoration or piece of furniture becomes detached, carefully reattach it using a suitable craft glue designed for miniature models. Allow the glue to dry fully before moving or displaying the dollhouse again.
Can humidity affect a DIY dollhouse?
Yes. High humidity can affect wooden components, paper decorations, and adhesives. Keeping your dollhouse in a dry, well-ventilated room will help preserve its appearance and structure.
Can I customise my dollhouse while cleaning it?
Absolutely. Cleaning is a great opportunity to rearrange furniture, add new decorations, or refresh the display. Just be sure to handle all miniature pieces carefully to avoid accidental damage.
How can I keep my dollhouse looking new?
Regular dusting, gentle handling, protection from sunlight and humidity, and displaying your dollhouse in a safe location are the best ways to keep it looking beautiful for years to come.