DIY Dollhouse Guide for Beginners
#Dollhouse Miniature GuideStarting your first DIY dollhouse is an exciting journey, but choosing the right miniature house kit can feel overwhelming. This beginner-friendly guide covers everything you need to know, from selecting your first dollhouse and understanding miniature scales to preparing your workspace, choosing the right tools, and avoiding common mistakes. Whether you're building for relaxation, creativity, or collecting, you'll gain the confidence to complete your first DIY dollhouse and enjoy every step of the process.
This beginner's guide will walk you through everything you need to know before starting your first miniature house. You'll learn how to choose the right kit, understand the different scales, prepare your workspace, avoid common mistakes, and enjoy the building process from start to finish.
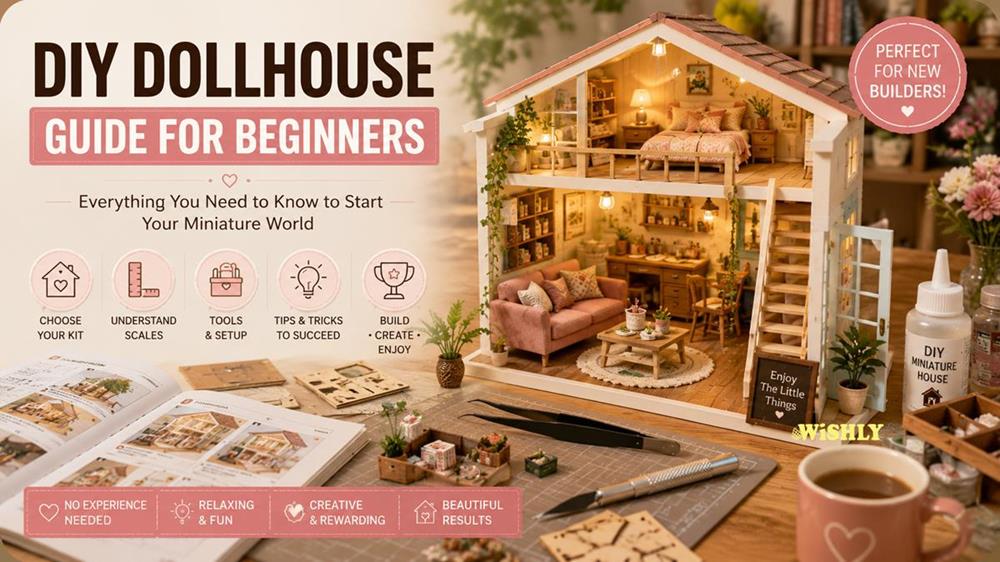
Table of Contents
1. Why DIY Dollhouses Are Great for Beginners
2. Choosing Your First DIY Dollhouse
3. What Comes Inside a DIY Dollhouse Kit?
4. Essential Tools You'll Need
5. Preparing Your Workspace
6. Building Your First DIY Dollhouse: Step by Step
7. Common Beginner Mistakes (and How to Avoid Them)
8. Ready to Build Your First DIY Dollhouse?
9. Frequently Asked Questions
1. Why DIY Dollhouses Are Great for Beginners
Many people assume DIY dollhouses are only for experienced crafters, but that's far from the truth. Modern miniature house kits are designed to be approachable, rewarding, and enjoyable for builders of all skill levels. With detailed instructions and pre-cut components, beginners can focus on the fun of assembling and decorating their miniature world rather than worrying about complex construction. Unlike many hobbies that require specialised skills or expensive equipment, DIY dollhouses only need a few basic tools and a little patience. As you build, you'll naturally develop new crafting skills, improve your attention to detail, and gain confidence with each completed section.A Relaxing and Rewarding Hobby
Building a miniature house offers a welcome break from busy daily life. Many hobbyists enjoy working on their dollhouse a little at a time, making it a relaxing way to unwind while creating something unique with their own hands. Whether you spend an hour after work or dedicate an entire weekend to your project, every tiny piece you assemble brings your miniature world one step closer to completion.Suitable for All Experience Levels
There's a DIY dollhouse for almost everyone. Smaller and simpler kits are perfect for first-time builders, while larger and more detailed designs provide an enjoyable challenge as your skills grow. Starting with a beginner-friendly project allows you to learn the basics without feeling overwhelmed, making it easier to progress to more advanced dollhouses in the future.More Than Just a Craft Project
A finished dollhouse isn't simply something you've built—it's a beautiful display piece you'll enjoy for years. Many builders discover that completing one miniature house inspires them to explore different architectural styles, collect new themes, and continue developing their miniature collection.Continue Exploring
Not sure which kit to choose? Read our Best DIY Dollhouses for Beginners to discover projects that are ideal for first-time builders. Read: Best DIY Dollhouses for Beginners2. Choosing Your First DIY Dollhouse
Choosing your first DIY dollhouse doesn't have to be complicated. Rather than looking for the biggest or most detailed miniature house kit, it's usually better to start with a project that matches your available time, display space, and confidence level. Completing your first dollhouse successfully is the best way to build experience and enjoy the hobby. As you browse different miniature house kits, consider four key factors: style, size, skill level, and the amount of time you'd like to spend building. Finding the right balance will make your first project both enjoyable and rewarding.Choose a Style You Love
The best DIY dollhouse is one that genuinely excites you. Whether you prefer the peaceful charm of a traditional Japanese home, the elegance of a European cottage, the clean lines of a contemporary modern villa, or the creativity of a magical fantasy scene, choosing a design you love will keep you motivated throughout the build. If you're drawn to cosy coffee shops or bookstores, a cafe or shop dollhouse could be the perfect choice. If you're looking for something unique to display between your favourite novels, a book nook offers a fun alternative to a traditional dollhouse.Start with a Beginner-Friendly Size
For your first project, it's usually best to choose a dollhouse with a moderate number of pieces and a straightforward layout. Smaller and medium-sized kits allow you to learn the basics of miniature building without feeling overwhelmed by a highly complex design. Once you've completed your first project, you'll feel much more confident tackling larger dollhouses with multiple rooms and more intricate details.Pick the Right Scale
For most beginners, 1:24 scale is an excellent place to start. It provides enough space to comfortably assemble furniture, install decorations, and appreciate the miniature details, while still fitting neatly on a bookshelf or desk once completed. Although 1:36 and 1:48 models are more compact, 1:24 generally offers the easiest and most enjoyable building experience for first-time hobbyists.Think About Display Space
Before purchasing a dollhouse, consider where you'll display it once it's finished. A bookshelf, desk, display cabinet, or side table can all make excellent homes for your completed miniature. Planning ahead ensures you choose a dollhouse that's not only enjoyable to build but also easy to showcase after all your hard work.Don't Worry About Perfection
Many beginners spend too much time trying to choose the "perfect" dollhouse. In reality, the best first project is simply one that matches your interests and inspires you to start building. Every completed kit teaches new skills, and each project builds confidence for the next.Continue Exploring
Need help comparing miniature sizes? Read our Dollhouse Scale Guide: 1:24 vs 1:36 vs 1:48 to find the scale that's right for you. Read: Dollhouse Scale Guide: 1:24 vs 1:36 vs 1:483. What Comes Inside a DIY Dollhouse Kit?
One of the most common questions beginners ask is what actually comes inside a DIY dollhouse kit. While every kit is different, most include everything needed to build the miniature house itself. The components are carefully designed to recreate realistic interiors, allowing you to assemble a beautiful miniature scene piece by piece. Depending on the style and complexity of the kit, you may find hundreds of tiny components that come together to create furniture, decorations, lighting, and architectural details.Laser-Cut Wooden Pieces
Most DIY dollhouses include precision laser-cut wooden sheets that form the structure of the house. Walls, floors, roofs, furniture, staircases, shelving, and other components are designed to fit together accurately, making assembly much easier.Miniature Furniture & Decorations
One of the most enjoyable parts of building a dollhouse is assembling the miniature furniture and decorative accessories. Many kits include tiny sofas, beds, tables, chairs, books, plants, artwork, kitchen accessories, and other realistic details that bring each room to life.Fabric, Paper and Decorative Materials
To create a realistic finish, many kits also include fabric, printed paper, wallpaper, flooring, curtains, cushions, bedding, and other decorative materials. These finishing touches add warmth, colour, and personality to your completed miniature house.LED Lighting Components
Many DIY dollhouses include warm LED lighting that transforms the finished model into a beautiful display piece. Depending on the design, you'll assemble the lighting system during the build before installing it inside the dollhouse. Be sure to check the product description to see whether batteries are included or need to be purchased separately.Illustrated Assembly Instructions
Every kit includes step-by-step illustrated instructions to guide you through the building process. While the number of steps varies between models, taking the time to read ahead before starting each stage will make assembly much smoother.What You'll Need to Provide
Although most DIY dollhouse kits include the building materials, you'll usually need to supply a few basic tools yourself. Items such as precision tweezers, craft glue, a craft knife, small scissors, and batteries (for LED models) are commonly required and can make the building process much easier.4. Essential Tools You'll Need
One of the biggest misconceptions about DIY dollhouses is that they require lots of expensive equipment. In reality, most beginners only need a few simple tools to make the building process easier and more enjoyable. Having these essentials ready before you begin will help you work more accurately and avoid unnecessary frustration.Precision Tweezers
Tweezers are one of the most important tools for miniature building. They make it much easier to pick up and position tiny furniture, decorations, and paper pieces that are difficult to handle with your fingers.Craft Glue
Most DIY dollhouse kits require glue to assemble furniture, decorations, and structural components. A quality craft glue that dries clear works best, and using small amounts will help keep your miniature looking neat and professional.Craft Knife
A sharp craft knife is useful for removing small pieces, trimming paper, and making minor adjustments during assembly. Always use a cutting mat and work carefully to protect both your project and your workspace.Small Scissors
Fine-tip scissors are perfect for cutting fabric, paper decorations, thread, and other lightweight materials included in many miniature house kits. A small pair designed for craft work usually provides the best control.Organisers or Small Containers
With so many tiny pieces included in a DIY dollhouse kit, it's easy for parts to get misplaced. Small containers, sorting trays, or compartment boxes are an inexpensive way to keep everything organised while you build.Batteries
If your dollhouse includes LED lighting, you'll usually need to provide the required batteries separately. It's a good idea to have them ready before you start so you can test the lighting during assembly.Optional Tools
As you gain more experience, you may find a few extra tools helpful. A magnifying lamp can make intricate details easier to see, while a small ruler, sanding stick, or fine paintbrush can be useful for customising and adding finishing touches to your miniature house.Start with the Basics
Don't feel pressured to buy every crafting tool available. A pair of tweezers, some glue, small scissors, and a craft knife are enough for most beginners. You can always expand your toolkit as your skills and collection grow.5. Preparing Your Workspace
Before opening your DIY dollhouse kit, it's worth taking a few minutes to prepare your workspace. A clean, organised area makes the building process much more enjoyable and helps prevent tiny pieces from getting lost. Even a small table or desk can become the perfect crafting space with a little planning. You don't need a dedicated craft room—just somewhere comfortable where you can work without feeling rushed. Creating a good workspace from the beginning will help you stay organised and focus on the fun of building your miniature world.Choose a Well-Lit Area
Good lighting makes a huge difference when working with miniature components. Natural daylight is ideal, but a bright desk lamp is just as effective, especially when assembling small furniture or decorative details.Use a Flat, Stable Surface
A sturdy table or desk provides the best foundation for your project. Avoid working on soft surfaces such as beds or couches, where small pieces can easily roll away or become difficult to find.Organise Your Parts
Before you start assembling, sort similar pieces into small containers or trays. Keeping furniture, decorations, lighting components, and wooden pieces organised will save time and make each stage of the build much smoother.Keep Your Tools Nearby
Place your tweezers, glue, craft knife, scissors, and other essential tools within easy reach. Having everything organised before you begin means you can focus on building instead of searching for supplies.Take Your Time
DIY dollhouses are meant to be enjoyed, not rushed. If you only have 30 minutes one evening, that's perfectly fine. Building a little at a time often leads to a more enjoyable experience and better results than trying to finish everything in one sitting.Create a Comfortable Space
Choose a comfortable chair, keep a drink nearby, and consider playing your favourite music or a relaxing podcast while you build. Creating an enjoyable environment can make assembling your dollhouse feel like a peaceful escape from everyday life.6. Building Your First DIY Dollhouse: Step by Step
Once your workspace is ready and your tools are within reach, it's time for the exciting part—bringing your miniature house to life. While every DIY dollhouse kit is different, most follow a similar building process. Taking each step slowly and staying organised will help you enjoy the experience and achieve the best possible result.Step 1: Read the Instructions
Before assembling anything, take a few minutes to read through the instruction manual. Familiarising yourself with the overall process will make each stage easier to understand and help you avoid mistakes later in the build.Step 2: Organise the Components
Remove the pieces from the packaging and sort them into groups, such as wooden parts, furniture, decorations, fabrics, and lighting components. Keeping everything organised makes it much easier to find the pieces you need as you progress through the project.Step 3: Assemble the Miniature Furniture
Many builders find it easier to assemble the furniture before installing it inside the dollhouse. Completing tables, chairs, shelves, beds, and other accessories first allows you to focus on the finer details before the rooms are assembled.Step 4: Build the Main Structure
Once the furniture is ready, begin assembling the walls, floors, and larger structural pieces according to the instructions. Work carefully and allow glued sections enough time to dry before moving on to the next step.Step 5: Install and Test the LED Lighting
If your DIY dollhouse includes LED lighting, install the lighting components as instructed and test them before permanently closing walls or attaching the roof. Confirming everything works now can save time and frustration later.Step 6: Add the Finishing Touches
The final stage is often the most rewarding. Arrange the miniature furniture, position decorative accessories, tidy any loose threads or excess glue, and take a moment to appreciate all the tiny details that bring your miniature world to life.Enjoy the Journey
Every DIY dollhouse is built one small piece at a time. Don't worry if a step takes longer than expected or if something isn't perfect on your first attempt. The goal isn't perfection—it's enjoying the creative process and taking pride in what you've built with your own hands.Continue Exploring
Want to improve your building skills? Read our Common DIY Dollhouse Mistakes to Avoid guide to learn simple tips that can help you achieve even better results. Read: Common DIY Dollhouse Mistakes to Avoid Curious how long your project might take? Explore our How Long Does It Take to Build a DIY Dollhouse? guide for estimated build times based on different kit sizes and skill levels. Read: How Long Does It Take to Build a DIY Dollhouse?7. Common Beginner Mistakes (and How to Avoid Them)
Every experienced miniature builder was once a beginner. It's perfectly normal to make small mistakes along the way, and most are easy to fix. Knowing what to watch out for before you begin can save time, reduce frustration, and make your first DIY dollhouse even more enjoyable.Rushing the Build
One of the most common mistakes is trying to finish the entire dollhouse in a single sitting. DIY dollhouses are designed to be enjoyed at a relaxed pace, so don't feel pressured to rush. Working a little at a time often produces better results and makes the experience far more enjoyable.Using Too Much Glue
Applying too much glue can leave visible marks, make delicate pieces difficult to position, and increase drying time. A small amount is usually all that's needed to create a strong bond while keeping your miniature looking neat.Skipping the Instructions
It's tempting to jump straight into building, but reading ahead can help you understand how each stage fits together. Spending a few minutes reviewing the instructions before you start often prevents unnecessary mistakes later in the project.Not Testing the LED Lights
If your dollhouse includes LED lighting, always test the lights before sealing walls or attaching the roof. It's much easier to replace a battery or adjust a wire while everything is still accessible.Losing Small Parts
Miniature components are easy to misplace. Keeping similar pieces organised in small containers or trays throughout the build will save time and reduce frustration when you're searching for the next part.Expecting Perfection
Your first DIY dollhouse doesn't need to be perfect to be something you're proud of. Small imperfections are part of the learning process, and each project helps you develop new skills and confidence. Focus on enjoying the experience rather than aiming for perfection.Continue Exploring
Want even more practical advice? Read our Common DIY Dollhouse Mistakes to Avoid guide for detailed tips and solutions to the most frequent building challenges. Read: Common DIY Dollhouse Mistakes to Avoid8. Ready to Build Your First DIY Dollhouse?
You've learned the basics of choosing a miniature house kit, preparing your workspace, using the right tools, and avoiding common beginner mistakes. Now it's time for the most exciting part—finding a DIY dollhouse that matches your interests and skill level. Whether you're drawn to a peaceful Japanese home, a charming European cottage, a contemporary modern villa, a cosy cafe, a magical fantasy scene, or a unique book nook, our collection includes beginner-friendly miniature house kits designed to make your first building experience both enjoyable and rewarding. Explore Our DIY Dollhouses9. Frequently Asked Questions
Can beginners build a DIY dollhouse?
Absolutely. Many DIY dollhouse kits are designed specifically for beginners, with clear illustrated instructions and pre-cut components. Starting with a beginner-friendly kit is the best way to learn the basics and build confidence for future projects.
What is the best DIY dollhouse for beginners?
The best beginner dollhouse is one that matches your interests and experience level. Simpler designs with fewer pieces and clear instructions are usually the easiest place to start, allowing you to enjoy the building process without feeling overwhelmed.
What tools do I need to build a DIY dollhouse?
Most beginners only need a few basic tools, including precision tweezers, craft glue, a craft knife, and small scissors. If your kit includes LED lighting, you may also need to provide the required batteries.
How long does it take to build a DIY dollhouse?
Build time depends on the size and complexity of the kit. Smaller beginner-friendly projects may be completed over a weekend, while larger and more detailed dollhouses can take several days or weeks. There's no need to rush—the building process is part of the enjoyment.
What is the best dollhouse scale for beginners?
For most first-time builders, 1:24 scale is an excellent choice. It offers a great balance between detail, ease of assembly, and display size, making it the most popular scale for DIY dollhouses.
Do DIY dollhouse kits include everything I need?
Most kits include the wooden components, miniature furniture, decorative materials, and illustrated instructions needed to build the dollhouse. Basic tools, glue, and batteries for LED lighting are usually purchased separately.
Are DIY dollhouses suitable for children?
Many DIY dollhouses are designed for teenagers and adults because they contain small parts and require careful assembly. Younger children may enjoy building with adult supervision, but always check the recommended age before purchasing.
Can I customise my DIY dollhouse?
Yes. Many builders personalise their dollhouses by rearranging furniture, adding miniature accessories, changing decorations, or creating their own unique finishing touches. Customising your dollhouse is a great way to make it truly one of a kind.
What should I do if I make a mistake?
Don't worry—small mistakes are a normal part of learning. Most issues can be corrected with a little patience, and every project helps you improve your skills. Remember, the goal is to enjoy the creative process, not to achieve perfection on your first attempt.
What's the next step after my first DIY dollhouse?
Once you've completed your first project, you might like to try a different style, a larger build, or a more detailed miniature house. As your confidence grows, you'll discover even more creative possibilities within the world of DIY dollhouses.